
What Makes a Lacrosse Highlight Video Actually Get Watched
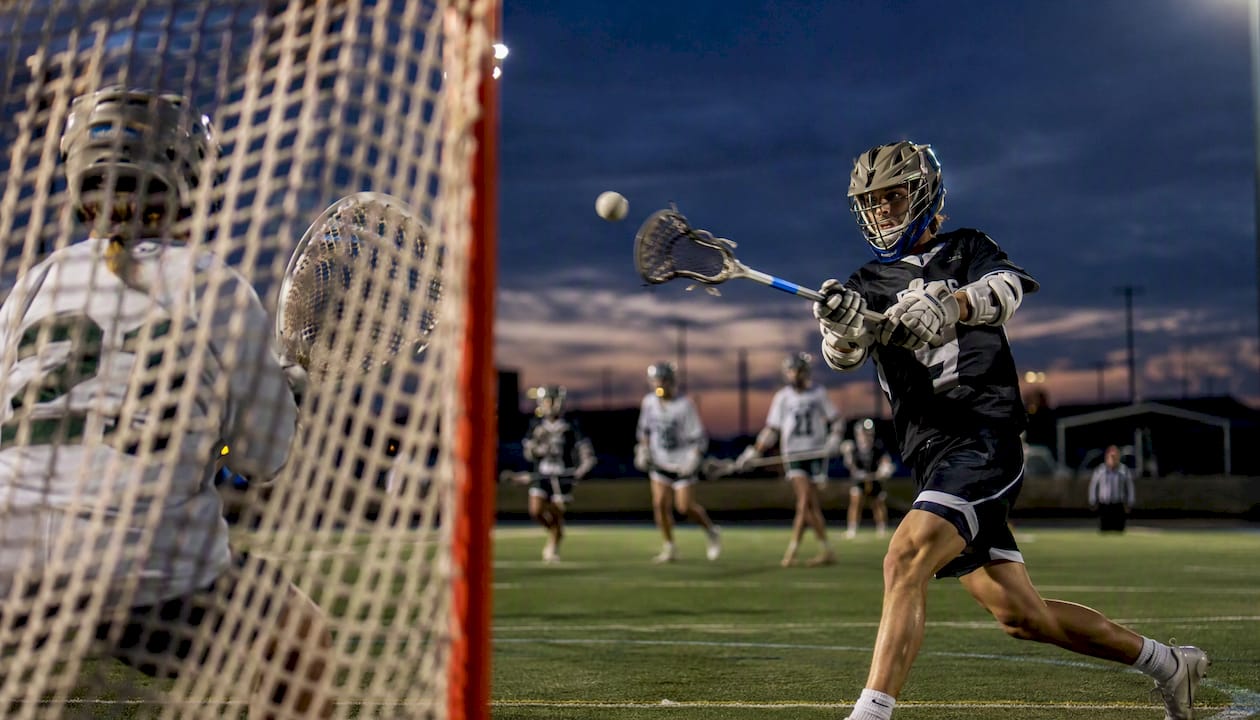
A coach-ready lacrosse highlight video runs under four minutes with roughly 20 to 30 strong game plays that show versatility and lacrosse IQ. Game footage beats staged drills every time, because coaches want to see decisions made under pressure. The goal isn’t to land a scholarship off the clip itself. It’s to get a coach to click your recruiting profile, watch a full game, or reply to your email. Tools like I-TRX simply make the capture part easier so you can focus on picking the right plays.
TL;DR:
Coaches prioritize versatility, strong decision-making, and consistent performance across multiple games over flashy highlights or solo skills.
Aim for a video under four minutes with 20 to 30 plays, focusing on live competition footage from varied opponents rather than rehearsed drills.
Proper filming techniques, such as elevated stable shots and clear jersey visibility, along with logging plays afterward, ensure high-quality editing.
Position-specific content matters, with attack reels highlighting scoring with both hands and feeds, while defense showcases turnovers and stops.
Automated tracking systems like wearables simplify filming by capturing complete games automatically, reducing dependence on manual recording.
Table of Contents
What Do Coaches Look For in a Lacrosse Highlight Video?
Coaches watch dozens of these a week, often on their phones between practices, leveraging modern sports intelligence tools like those featured on AuksPort to help analyze player highlights efficiently. They’re not looking for a highlight compilation set to a hype song. They’re scanning for signals that a player can produce in a real game against real competition, repeatedly, across different opponents.
Here’s what actually moves the needle:
Versatility and lacrosse IQ: clips that show good decision-making and off-ball positioning, not just the finish.
Athleticism under pressure: how you move when a defender is closing, not how you look on an empty field.
Consistency across clips: the same footwork, same field awareness, appearing in game three as much as game one.
Multiple-game sourcing: footage pulled from several contests against varied competition levels, not one lucky afternoon.
Clear player identification: an intro slide with your name, class year, and a link to your recruiting profile.
NCSA’s recruiting guidance is built around exactly this lens: coaches evaluate the reel to decide whether you’re worth a deeper look, not to make a final decision.
How Long Should a Lacrosse Highlight Video Be?
Keep it under four minutes with 20 to 30 plays. That’s the standard NCSA recruiting guideline, and it holds up because coaches simply won’t sit through more than that during a first pass.
The number that matters most: 20 to 30 plays, under 4 minutes. Anything longer and you’re betting on a coach’s patience instead of your film.
Prioritize footage from live competition over solo skills sessions. A behind-the-back shot in an empty gym tells a coach nothing about how you’ll perform with a defender in your hip pocket. Cut anything redundant, three clips of the same dodge from the same angle add nothing, and open with your single best play. That first clip decides whether the rest gets watched.
Capture and Edit Workflow for a Coach-Ready Reel
Building a usable reel starts before you ever open editing software. It starts with how you film.
Film from an elevated, stable position. A tripod on a hill, bleacher, or sideline platform beats handheld every time, and landscape orientation is non-negotiable.
Confirm your jersey number is visible in the frame before the game starts, so nobody has to guess which player is yours later.
Log and tag clips after each game, noting the play type and opponent while it’s fresh, instead of scrubbing through hours of footage in April trying to remember March.
Narrow to 20 to 30 plays, lead with your standout moment, then order the rest to show range across situations rather than just your greatest hits.
Add identification graphics, a name and class year slide up front, and export at 1080p as an H.264 MP4 in 16:9, targeting a 6 to 8 Mbps bitrate for clean upload quality without a bloated file.
Name the file with a recruiting-ready convention so a coach’s inbox search actually finds it later.
Pro Tip: Save your file and video title the same way you’ll want a coach to find it again, six months from now, in a folder with fifty other recruits’ names in it.
Manual filming works, but it demands a dedicated parent or teammate at every single game. An automated tracking system that locks onto one athlete removes that dependency entirely, which matters most for families who can’t guarantee someone’s behind a tripod every Saturday.
Position-Specific Guidance: What Attack, Midfield, Defense, and Goalies Should Show
A defenseman’s highlight reel and an attacker’s reel should look almost nothing alike. Coaches evaluating each position are scanning for different fundamentals, and a reel that ignores those differences signals you don’t understand your own role.
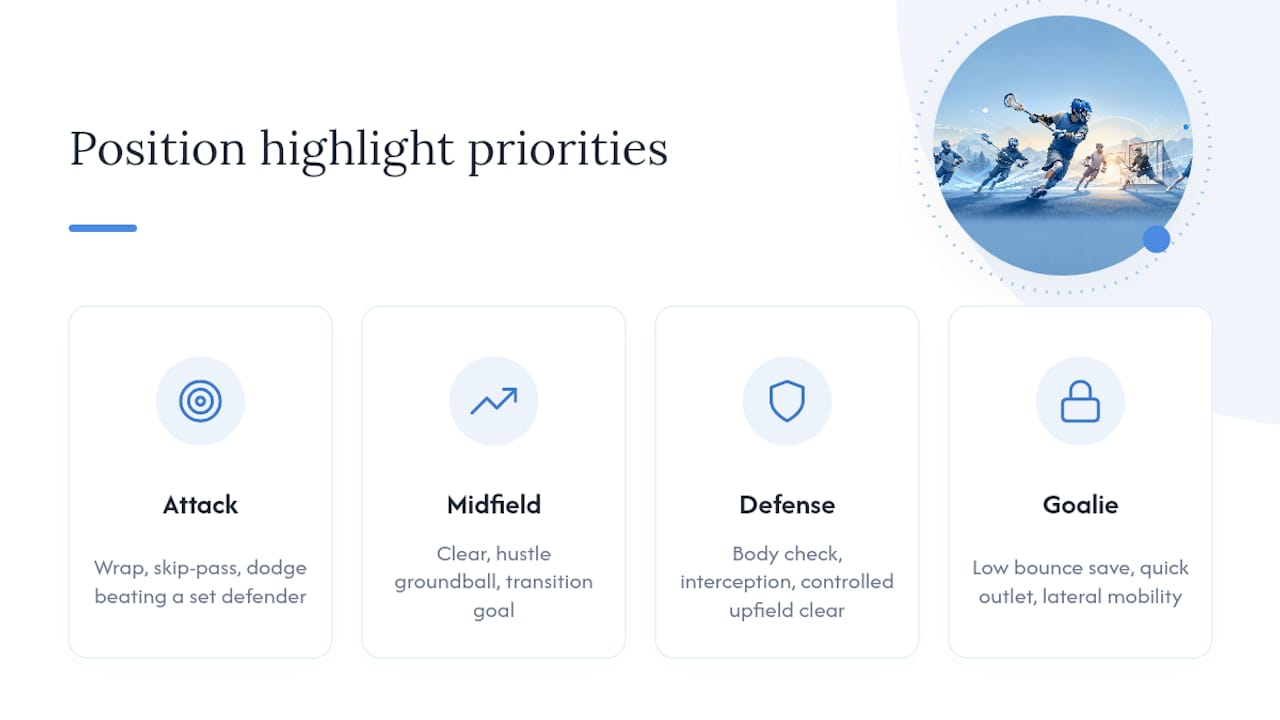
Attack should show goals from both hands, feeds that lead to assists, and sharp changes of direction against tight coverage. A behind-the-net wrap finish, a skip pass through a sliding defense, and a dodge that beats a set defender are the three clips that matter most.
Midfield needs transition plays, ground ball pickups in traffic, and evidence of stamina across both ends of the field. Faceoff wins belong here too, if that’s part of your game. Show a clear from your own end, a hustle groundball, and a transition goal.
Defense lives on one-on-one stops, forced turnovers, and clean outlet passes after a takeaway. A body check that separates ball from stick, an interception in the passing lane, and a controlled clear upfield tell the whole story.
Goalies should feature high-percentage saves, vocal communication with the defense, and clears under pressure. A low save on a bounce shot, a quick outlet after a stop, and lateral mobility across the crease round out the picture.
How to Organize and Edit for Maximum Recruiter Impact
The first 30 seconds decide everything. Coaches scan the opening closely, and if it’s unclear who the primary player is, many won’t watch past it. Lead with your best play, not a slow build.
A few edits carry outsized weight relative to how little effort they take:
Open with your single most impressive play, no warm up footage, no team introduction.
Use a consistent visual marker, a circle or arrow, if you’re not the obvious focal point in a wide shot.
Add an intro slide with name, position, class year, height, and a recruiting profile link, right up front.
Alternate high-impact plays with steadier, supporting clips so coaches see peak ability and week-to-week reliability, not just one highlight-reel moment.
Export at 1080p H.264 MP4, and host on YouTube with a direct link to your recruiting profile in the description.
Championship packages like the Princeton vs. Notre Dame highlights show this pacing in action at the highest level: fast cuts, clear player focus, no dead air between plays.
Where Should You Post and Share Your Highlight Video?
YouTube, set to unlisted or public, is the standard. Pair it with a recruiting profile page so coaches have one authoritative link to click, not a scattered mess of social posts.
Name the file and video title consistently: something like “[Full Name] Lacrosse Recruiting Video Class of 2027,” following the naming convention NCSA recommends.
Put your recruiting profile link in the video description, not buried in a comment or a bio somewhere else.
Email coaches directly with the link rather than hoping they stumble across it, and include full-game footage access if they ask for it.
Short clips are fine for social media, but treat your YouTube upload and recruiting profile as the version that actually gets evaluated.
How Automated Tracking Solves the Filming Problem
Most families lose highlight-worthy plays not because their kid didn’t make them, but because nobody was filming at the right second. A wearable sensor paired with a tracking camera locks onto one athlete automatically, following the play without a parent juggling a phone and a lawn chair.
Instant video saving and easy sharing straight to an iPhone are the features users highlight most, because the footage is usable the moment the game ends instead of sitting untouched on a memory card.
That footage drops straight into your selection and editing workflow. You still log plays, still pick your best 20 to 30, still build the intro slide, but you’re choosing from complete game coverage instead of whatever a distracted parent managed to catch.
Pro Tip: Use full-game tracking mode for tournaments where you’re playing multiple games in a day, then switch to delayed solo review that evening when you actually have time to tag clips.
Equipment and Software for Filming and Editing Lacrosse Highlights
You don’t need a broadcast rig to produce a coach-ready reel, but a few pieces of gear separate usable footage from unusable footage. A tripod is the single highest-value purchase you can make. Handheld footage shakes, drifts, and makes editors’ lives miserable, while a $30 to $80 tripod on a sideline or elevated platform solves that instantly.
For zoom, an optical zoom lens or a camera with strong digital stabilization matters more than raw resolution. A 1080p shot that’s steady and well-framed beats a shaky 4K clip every time a coach is deciding whether to keep watching.
On the software side, free tools like iMovie or DaVinci Resolve handle basic cutting, intro slides, and export settings without a subscription. Adobe Premiere Rush is a step up if you want more control over transitions and text overlays. Whatever you choose, export in 1080p H.264 MP4 format at a 6 to 8 Mbps bitrate, which uploads cleanly to YouTube and plays reliably inside most recruiting profile platforms.
Automated systems shift the equipment equation entirely. Instead of a tripod, a zoom lens, and someone dedicated to operating both, a wearable sensor paired with tracking hardware handles framing and zoom on its own, which matters most for families covering multiple games in a single weekend where nobody has a free hand to film.
Legal Considerations: Using Game Footage and Player Likenesses
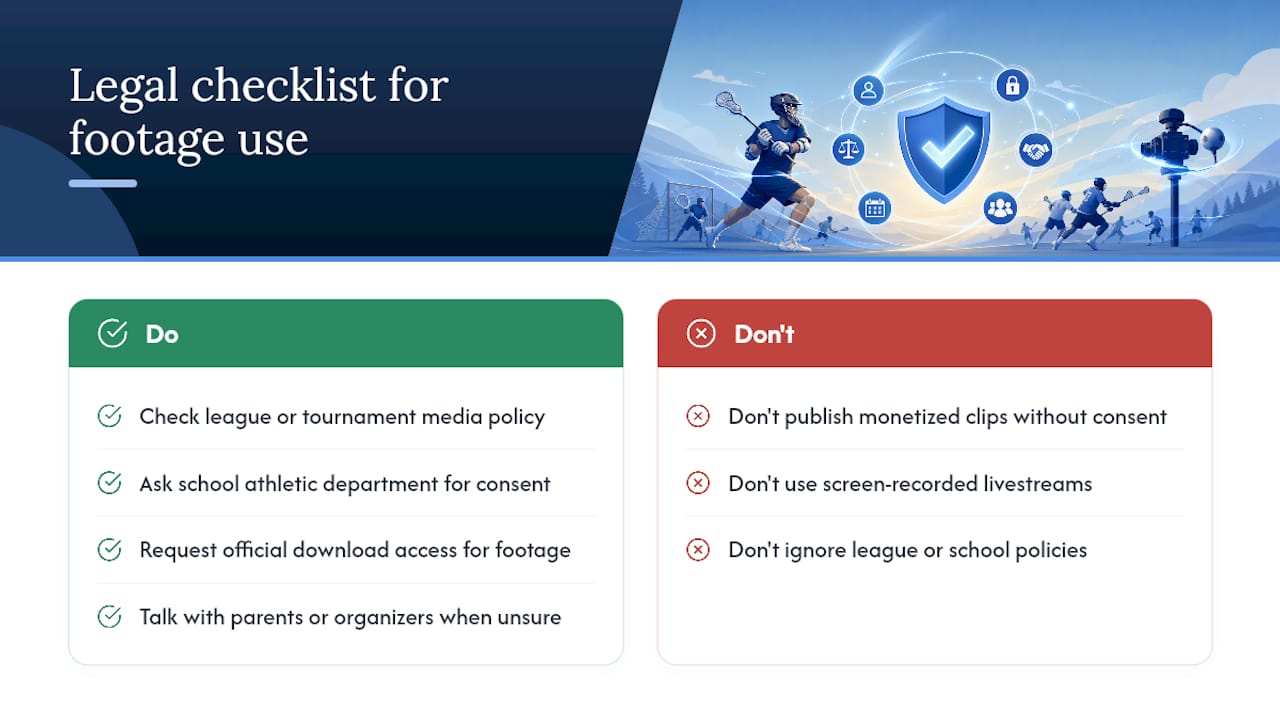
Filming your own child at a public youth sports event is generally permissible for personal and recruiting use in the United States, but the moment other players, coaches, or officials appear clearly in frame, the picture gets more complicated. School districts, club organizations, and tournament operators often have their own media policies governing footage recorded at their events, and those policies vary by league and by state.
Before publishing a reel that prominently features opposing players, check your league or tournament’s media policy, and when footage comes from a school-sanctioned game, ask the athletic department whether they require consent for footage beyond personal recruiting use. Most recruiting-focused clips fall under fair, limited use since the purpose is evaluation rather than commercial gain, but a video monetized on YouTube or used in paid promotional material shifts into different territory that may require broader consent.
If you’re pulling footage from a third-party tournament provider rather than filming yourself, request official download access rather than screen-recording a compressed livestream. Native files edit cleaner, and using officially licensed footage sidesteps questions about whether you had rights to that clip in the first place. When in doubt on anything involving another family’s child appearing prominently in your video, a quick conversation with the other parent or the tournament organizer avoids problems entirely.
Music and Sound Design for Better Viewer Engagement
Music sets pace, but it can also work against you if it’s louder than the point you’re trying to make. A common mistake is picking a track first and cutting the highlights to match its beat, when the sequence should work the other way around. Pick your 20 to 30 plays, then find music that supports the rhythm you’ve already built.
Keep the volume low enough that a coach could mute it entirely and still follow the action through pacing and cuts alone. That’s the real test of whether your edit works: does the sequence of plays tell the story on its own, or is the soundtrack doing the heavy lifting?
For song choice, stick to instrumental tracks or music with minimal lyrics; anything with explicit language is an easy way to get a video skipped or flagged on YouTube. Royalty-free libraries built into editing software like iMovie or DaVinci Resolve avoid copyright strikes entirely, which matters if you’re hoping to keep the video public and searchable rather than blocked in certain regions.
One more detail that trips people up: match music transitions to play transitions. A beat drop landing right as you release a shot on goal reads as intentional and polished. A beat drop landing in the middle of a slow-motion replay of a groundball scramble reads as random, and coaches notice the difference even if they couldn’t articulate why.
Should You Make Different Highlight Videos for Different Viewers?
A single well-built reel works for most purposes, but the way you frame and distribute it should shift depending on who’s watching. Coaches want efficiency: your best 20 to 30 plays, position-relevant footage, and a clear path to your full recruiting profile if they want more. They’re not watching for entertainment, they’re evaluating fit for a roster spot.
Recruiters at the college level often want access to full-game footage in addition to the highlight reel, especially once they’ve moved past initial interest into serious evaluation. This is where having game film archived and organized, not just your top clips, pays off. A recruiter who likes your highlight video will frequently ask for a full game against a specific opponent to see how you perform without the edit smoothing over any inconsistency.
Teammates and family, by contrast, are your audience for social clips and celebratory moments. That version can run longer, include more personality, and lean into music and highlight-reel energy without worrying about pacing discipline. Don’t confuse this cut with your recruiting version. Sending a coach a link built for Instagram engagement, complete with slow-motion celebration replays and loud music, undercuts the professional impression your recruiting profile is trying to build. Keep the two versions separate, and always point coaches specifically to the recruiting cut.
A Seven-Step Checklist to Get Started
If you take one thing from this guide, take this: capture from an elevated spot or use automated tracking, log footage after each game, and pick your 20 to 30 best plays, opening with your strongest one. Add a simple intro slide with name and class year, host on YouTube plus your recruiting profile, keep it under four minutes, and follow up with coaches after you send it.
— John
Let I-TRX Handle the Camera So You Can Focus on the Clips
I-TRX solves the one problem every family runs into with recruiting film: someone has to actually operate the camera, every game, without missing the play that matters. The wearable sensor locks onto one athlete automatically, saves clips instantly, and shares straight to an iPhone with no monthly subscription tying you down.
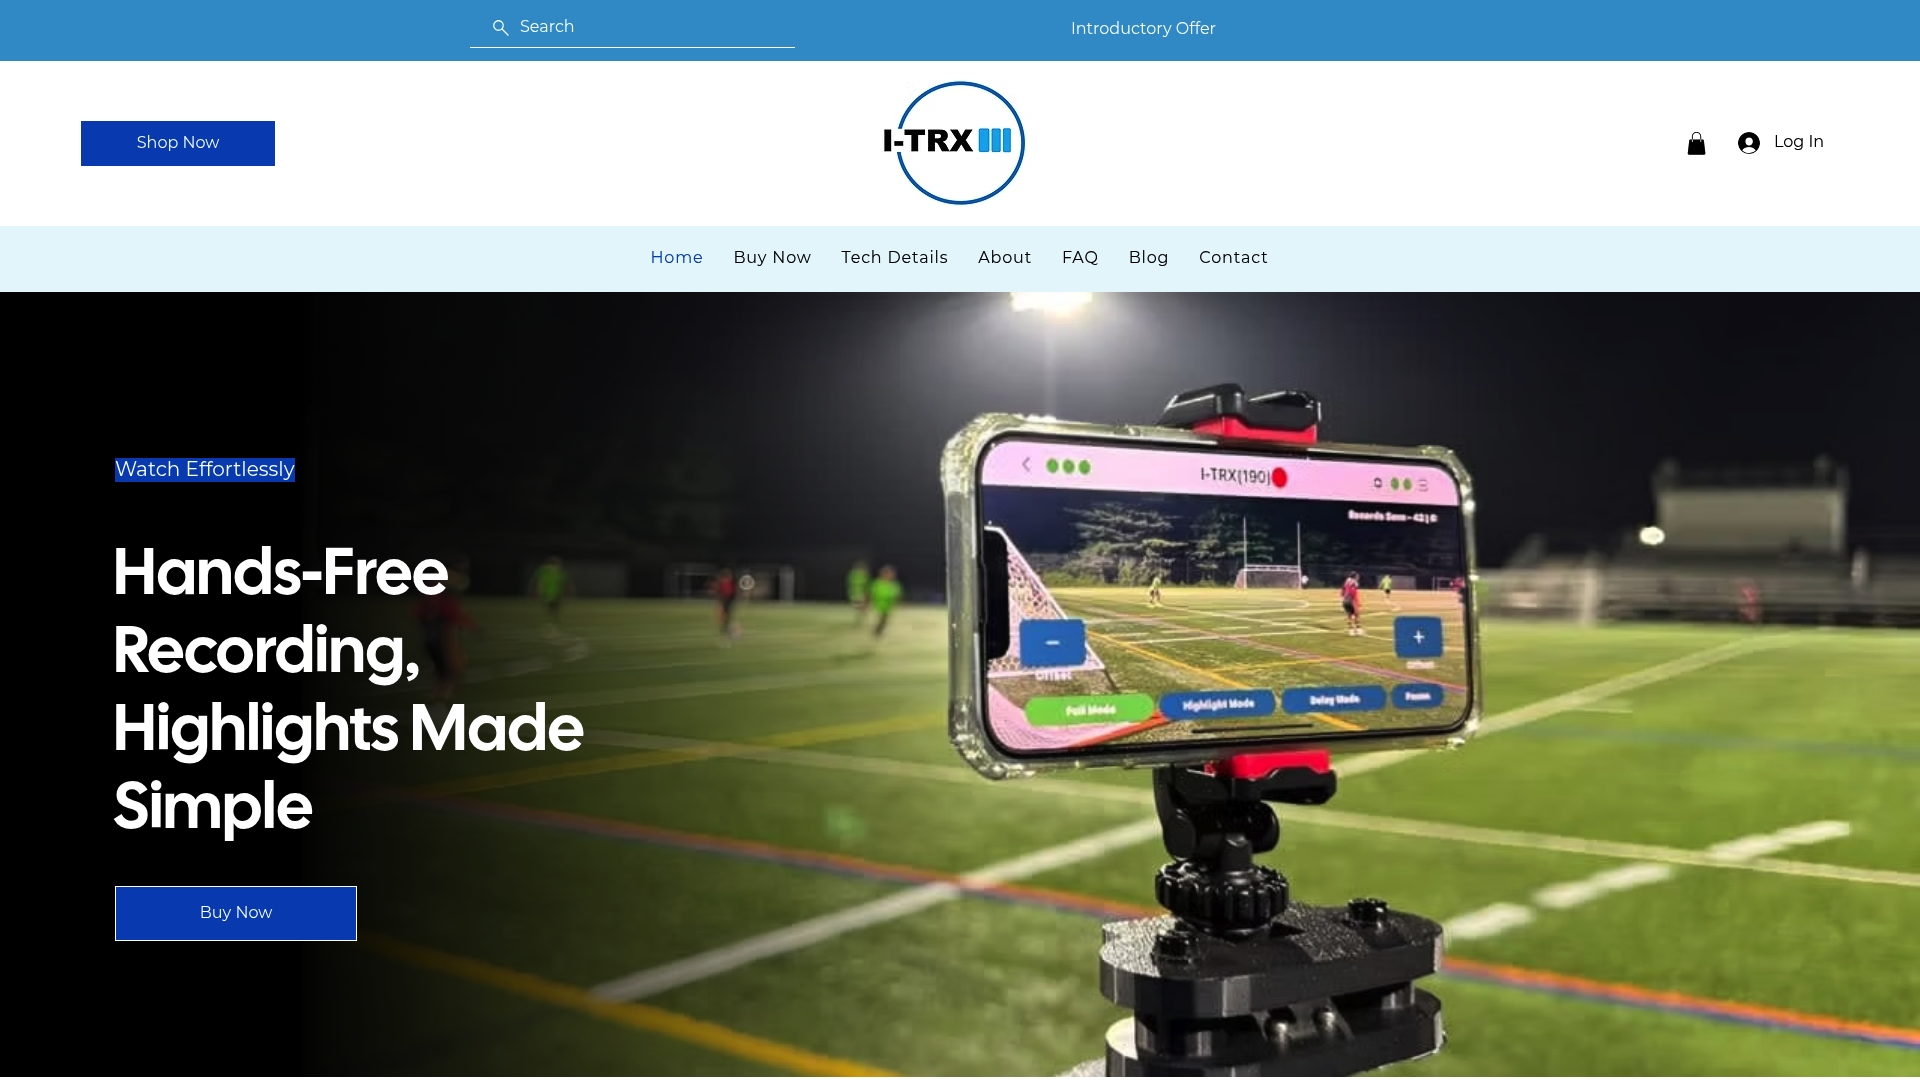
That means the footage you need for a 20 to 30 play recruiting reel is already sitting on your phone after the final whistle, instead of scattered across someone’s memory card from three different tournaments. Full-game recording mode covers the entire match, while delayed solo review mode lets you pull individual highlights later when you have time to sit down and edit. Check the full technical specs to see how the system integrates with your existing editing workflow, or visit the I-TRX home page to see current system options and get started before your next tournament weekend.
Sources
Recommended
Comments